11 KiB
| title | author | image | date | tags | redirect_from | ||||
|---|---|---|---|---|---|---|---|---|---|
| The Definite Guide To Watermarks In Apple Aperture | Matthias Kretschmann | ../media/watermark_aperture.jpg | 2008-10-26 16:05:58+00:00 |
|
|
I received quite a few mails in the last days from Aperture users asking for the best way to add your copyright information or any other so called watermark to your images in an Aperture 2 workflow. Especially new users to Aperture find it quite confusing why there isn't something like a text brick in the Adjustments panel. So Aperture itself lacks the ability of quickly adding some lines of text to your images but nevertheless it has a watermarking feature.
In this article I will lay out every way I've found to add watermarks to your images in an Aperture 2 workflow and will discuss the advantages and disadvantages of each solution. The goal of this article is to give you a brief overview about the various ways you can add watermarks to your images so you can easily choose the best one for different needs. In short these are the possibilities:
1. The Aperture Way
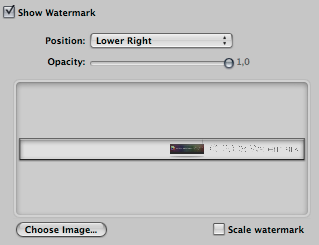
Aperture has built-in support for watermarking your images on export. But you have to create a watermark image in a bitmap graphic editor like Photoshop, Pixelmator or Acorn before you can start adding watermarks. But I've written a detailed article about how to use this feature of Aperture back in May 2008 named HowTo: Use high-quality watermarks in your images with Aperture 2.1. In short, you have to create your watermark image first and then define it in a new export preset. In the end all images exported with this preset will have your defined watermark image on them. If you want to watermark your images the Aperture way be sure to check out my tutorial.
This way is perfect if you want to watermark a lot of images at once or if your copyright info doesn't change often. And this works with Aperture's Web Journal or Web Page feature if you add a watermark image to the export presets for that. Also this works with any other export plug-in in Aperture which utilizes the export presets, like the FlickrExport plug-in. You just have to create e.g. a flickr export preset, define your watermark image there and chose it inside of FlickrExport from the export preset dropdown list.
Update 10/31/2008: Another advantage is the system wide integration of this feature. E.g. you can use Aperture's built-in watermark feature in combination with an Automator workflow. Just create your export preset with a watermark enabled in Aperture. In Automator you can drag the Export Versions action from the Photo section to your workflow and chose the export preset you've created.
But adding some lines of text to just one image or different text to different images can be rather complex cause you have to create lots of different watermark images and export presets.
1.1 MobileMe Albums
For whatever reason Apple decided to not use the export presets for MobileMe Albums so you can't watermark your images published through MobileMe Albums with this built-in feature. The only way to achieve this is to add the watermark outside of Aperture and reimport this image or you use an edit plug-in for this where your watermark will be rendered on the image.
But you can still use the Web Export Presets with a watermark defined when publishing an Aperture Web Page or a Web Journal through MobilMe.
2. The External Editor Way
Because of Aperture's workflow design you're always free to open up your image in your favorite external editor from within Aperture and add your copyright information and more to your image. Just add your favorite image editor in the Aperture preferences under the Export tab and set the file format you want to have.
Now you can just right click or ctrl + click on every image to open the context menu and choose Edit With whereas the first entry will be your external editor set in the preferences. Aperture will automatically render your image creating a new file and opens that up. Just add a new text layer in your external editor, type in your preferred text and save the file from there. Aperture will update with the changes accordingly.
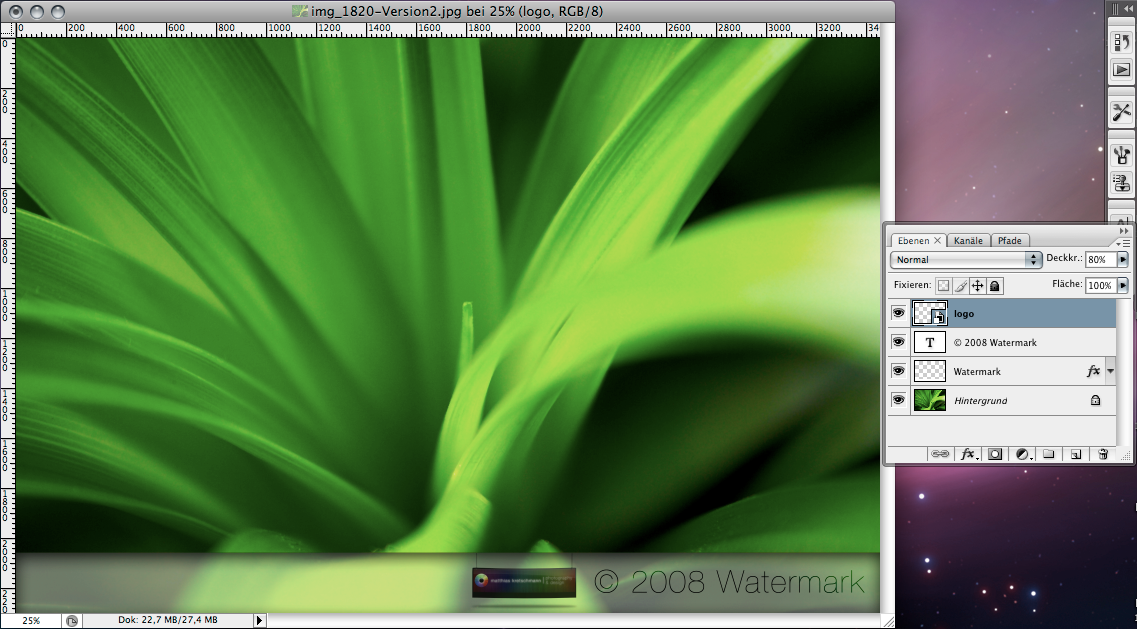
Using this method gives you the most flexibility since you can add everything to your image and come back with it in Aperture. And if you use Photoshop and choose to use psd as external editor file format you can easily add all your non-destructive layers in Photoshop an Aperture will live render those layers. Opening the psd file again from within Aperture will give you all the editable layers you created earlier.
But since Aperture always creates a psd or tiff file for that you will end up with rather large file sizes even if you just add two letters in your external editor.
3. The Plug-In Way
3.1 Aperture BorderFX
Aperture BorderFX is an export plug-in for Aperture written by Reinhard Uebel which was available long before Aperture 2. This plug-in allows you to add borders but also titles and even more to images as you export them. The plug-in is free but the author asks for donations. In short this plug-in gives you the ability to create your watermark (and also borders) inside of the Aperture environment. You set all your output preferences inside of the plug-in window so it doesn't use the Aperture export presets.
But it has some powerful features in terms of watermarking: It can read out some IPTC fields to use the text as your copyright text, it is capable of saving presets and you can open several images at once in the plug-in window. So it works similar to Aperture's built-in watermarking feature but gives you full control over the watermark look without leaving Aperture.

This plug-in gives you a lot of flexibility about your watermark look without firing up a graphical editor like Photoshop. Also you're not leaving a non-destructive workflow with this plug-in since all the changes are just rendered on your exported images. With the combination of using the plug-in presets and the capability of opening several images at once with the plug-in you can have different watermarks on different images very quickly.
But you can't see your changes made in the plug-in on the images in your library. But Reinhard stated in his blog he's working on an edit plug-in based on the new Aperture 2.1 SDK where the changes will be rendered (destructively) in a psd file.
3.2 Apple's Borders & Titles Plug-In
With the release of Aperture 2.1 and its Edit Plug-In architecture Apple also released some sample plug-ins which aren't included in Aperture (just the Dodge & Burn plug-in is). But you can easily download it from Apple’s Developer Connection website without registration for free.

This is also something I've covered earlier in my blog with a short article: Quick Tip: Borders & Titles Plug-In for Aperture.
The functionality of this plug-in is rather rudimentary but it's indeed the quickest way if you just want to add some lines of text to one particular image. But adding the same text on several images can be very frustrating since you can't open more than one image at a time inside the plug-in window.
As with every Edit Plug-In every time you fire up an image with this plug-in Aperture will create a psd file and after hitting save in the plug-in your changes will be rendered destructively on this psd file. So there's no way to go back here without creating a new psd file and starting again.
3.3 Impression For Aperture Plug-In
Impression is an Aperture Edit Plug-In from Blue Crowbar Software released in Sept. 2009. The developer claims it's mainly targeted for those people who want to have a copy of their watermarked image within Aperture. Also there's a nice blog post by the developer lining out why he thinks this plug-in beats Aperture's builtin watermarks.

This plug-in is pretty powerful and probably the best choice for watermarking your images in Aperture through an Edit Plug-In workflow. Watermarking multiple photos at once is also possible and you can use existing PSD or PNG images as a watermark image as well as from a RTF text file. Apart from the functionality it also has a quite beautiful UI with the controls laying over your image.
4. Conclusion
So you see there are quite a few possibilities for adding watermarks in your Aperture workflow although the most comfortable solution, a brick in the adjustment panel for adding text or watermark images non-destructively isn't there (yet?).
And, except for the export plug-ins, you will leave a non-destructive workflow since all your changes to the image are rendered in a psd or tiff file and any further adjustments in Aperture will also affect your watermark. Also there's no way of going back with these solutions without creating a new psd file.
So to stay within a non-destructive workflow and to avoid unnecessary big file sizes you should try to use either Aperture's built-in watermarking feature or Reinhard's BorderFX plug-in in your workflow.
But if you want e.g. different text on just a few images and want to have your watermarked image within Aperture you should try using the Edit plug-ins or your external editor. Also if you don't care about big file sizes for rather minor changes you can use the Edit plug-ins for watermarking although you'll slightly leave Aperture's non-destructive workflow design with this. This by the way is the case with all the Edit plug-ins. But that's another story...
And that's it folks. I hope this article helps you finding the right method for watermarking your images in an Aperture workflow. Feel free to post in the comments about your experiences or any additions you have. Also don't forget to spread the word about this article on your favorite social bookmarking site.