10 KiB
| title | description |
|---|---|
| Publish assets using hosting services | Tutorial to publish assets using hosting services like AWS and Azure. |
Publishing with Hosting Services
Table of Contents
Overview
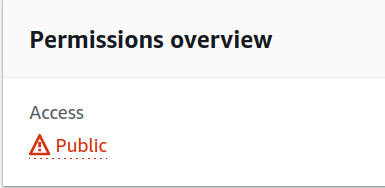
To publish on the Ocean Marketplace, publishers must first host their assets. It is up to the asset publisher to decide where to host the asset. For example, a publisher can store the content on a decentralised storage like Arweave or choose a centralised solution like their AWS server, private cloud server, or other third-party hosting services. Through publishing, the information required to access the asset is encrypted and stored as a part of DDO on the blockchain. Buyers don't have access directly to this information, but they interact with the Provider, which decrypts it and acts as a proxy to serve the asset. The DDO only stores the location of the file, which is accessed on-demand by the Provider. Implementing a security policy that allows only the Provider to access the file and blocks requests from other unauthorized actors is recommended. One of the possible ways to achieve this is to allow only the Provider's IP address to access the data. But, not all hosting services provide this feature. So, the publishers must consider the security features while choosing a hosting service.
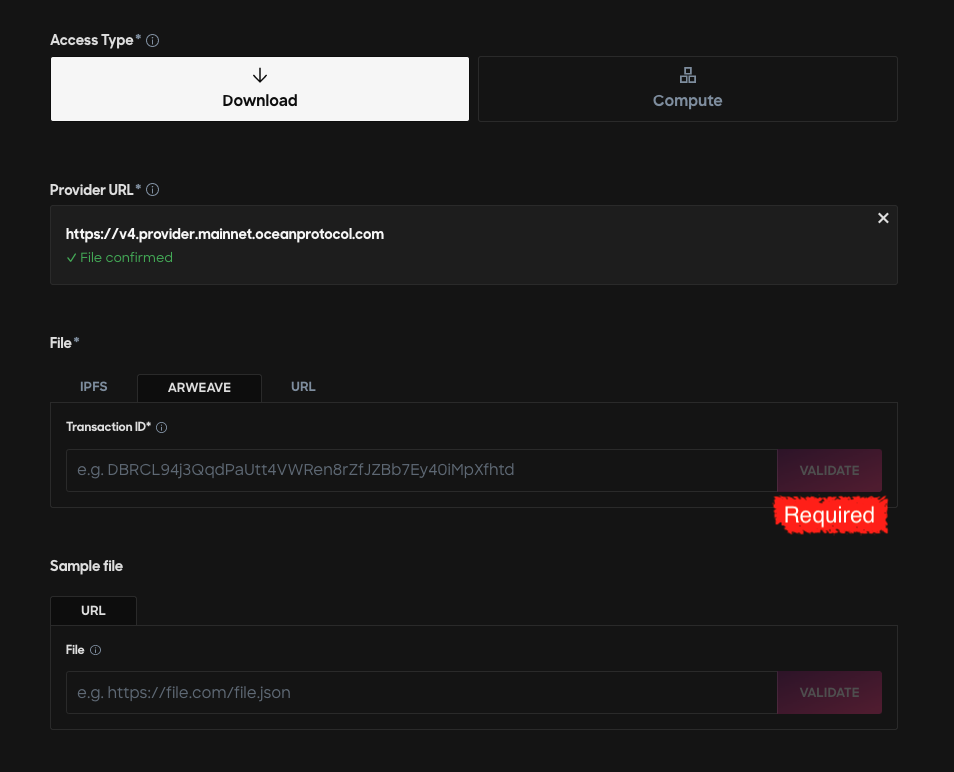
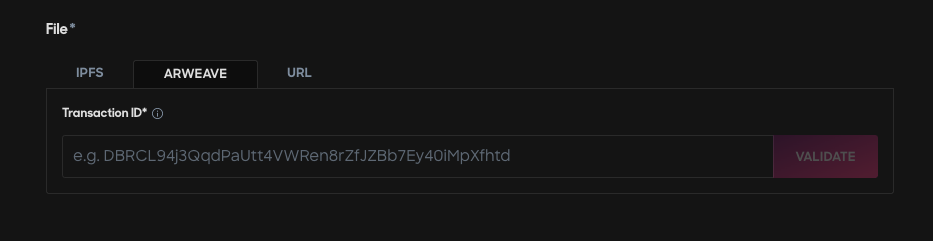
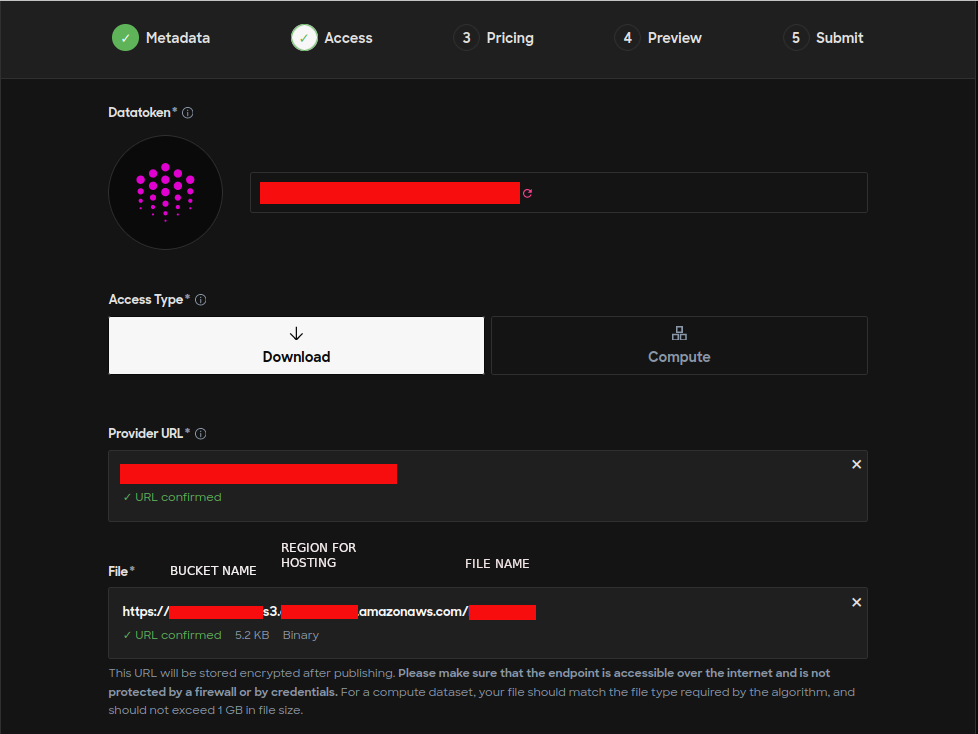
On Ocean Marketplace, a publisher must provide the access information to the asset during the publish step in the field shown in the below image.
Publishers can choose any hosting service of their choice. The below section explains how to use commonly used hosting services with Ocean Marketplace.
⚠️ Note
Please use a proper hosting solution to keep your files.
When using some systems (for example, Google Drive) that are not specifically
designed for this use case, you risk not gaining traction. Systems such as Google Drive,
include various virus checks and rate limiters that prevent the Provider to download the asset once it was purchased.
Decentralised hosting
Arweave
Arweave is a global, permanent, and decentralized data storage layer that allows you to store documents and applications forever. Arweave is different from other decentralized storage solutions in that there is only one up-front cost to upload each file.
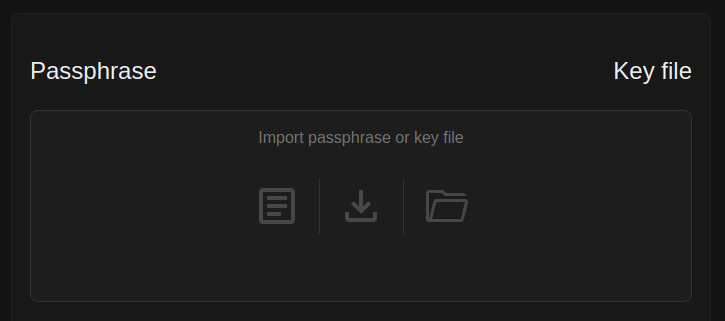
Step 1 - Get a new wallet and AR tokens
Download & save a new wallet (JSON key file) and receive a small amount of AR tokens for free using the Arweave faucet. If you already have an Arweave browser wallet, you can skip to Step 3.
At the time of writing, the faucet provides 0.02 AR which is more than enough to upload file.
If at any point you need more AR tokens, you can fund your wallet from one of Arweave's supported exchanges.
Step 2 - Load the key file into the arweave.app web wallet
Open arweave.app in a browser. Select the '+' icon in the bottom left corner of the screen. Import the JSON key file from step 1.
Step 3 - Upload file
Select the newly imported wallet by clicking the "blockies" style icon in the top left corner of the screen. Select Send. Click the Data field and select the file you wish to upload.
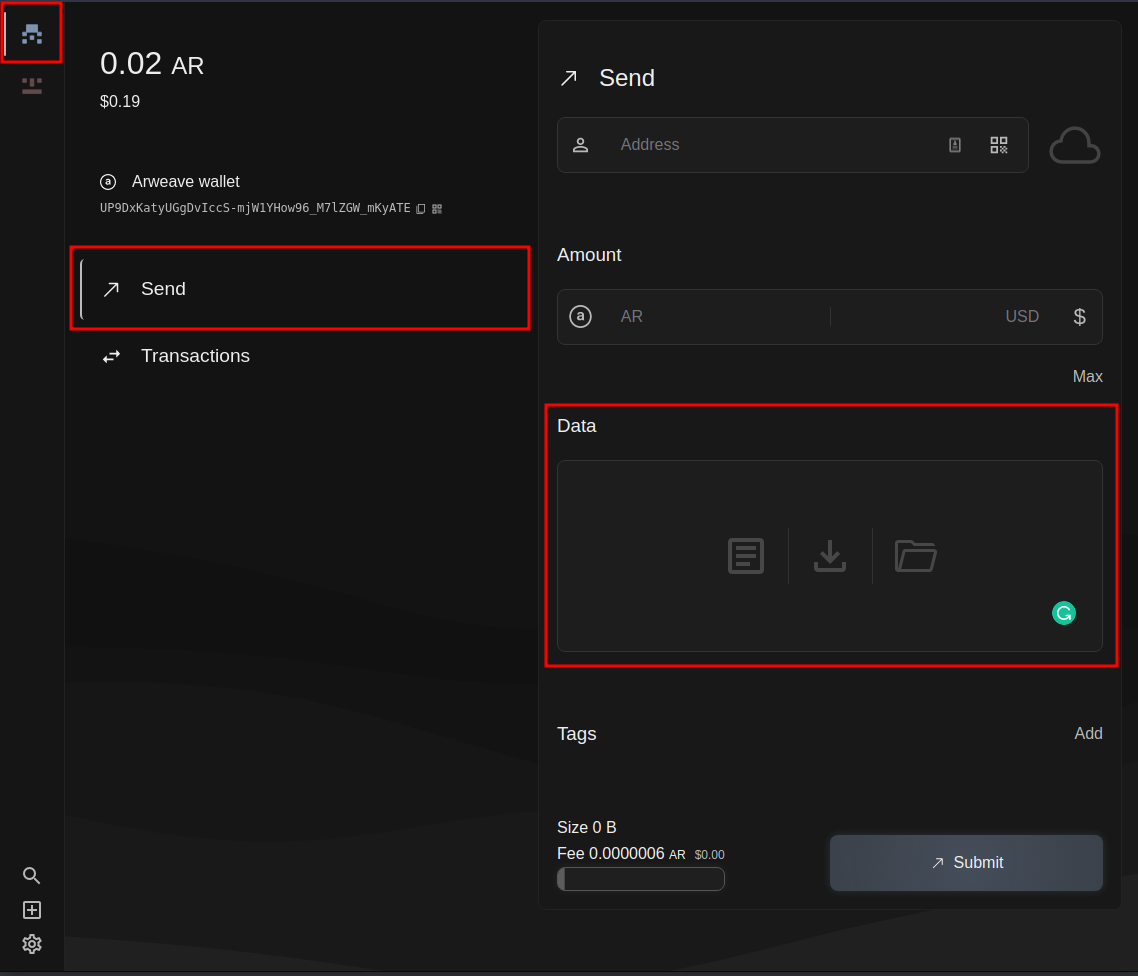
The fee in AR tokens will be calculated based on the size of the file and displayed near the bottom middle part of the screen. Select Submit to submit the transaction.
After submitting the transaction, select Transactions and wait until the transaction appears and eventually finalizes. This can take over 5 minutes so please be patient.
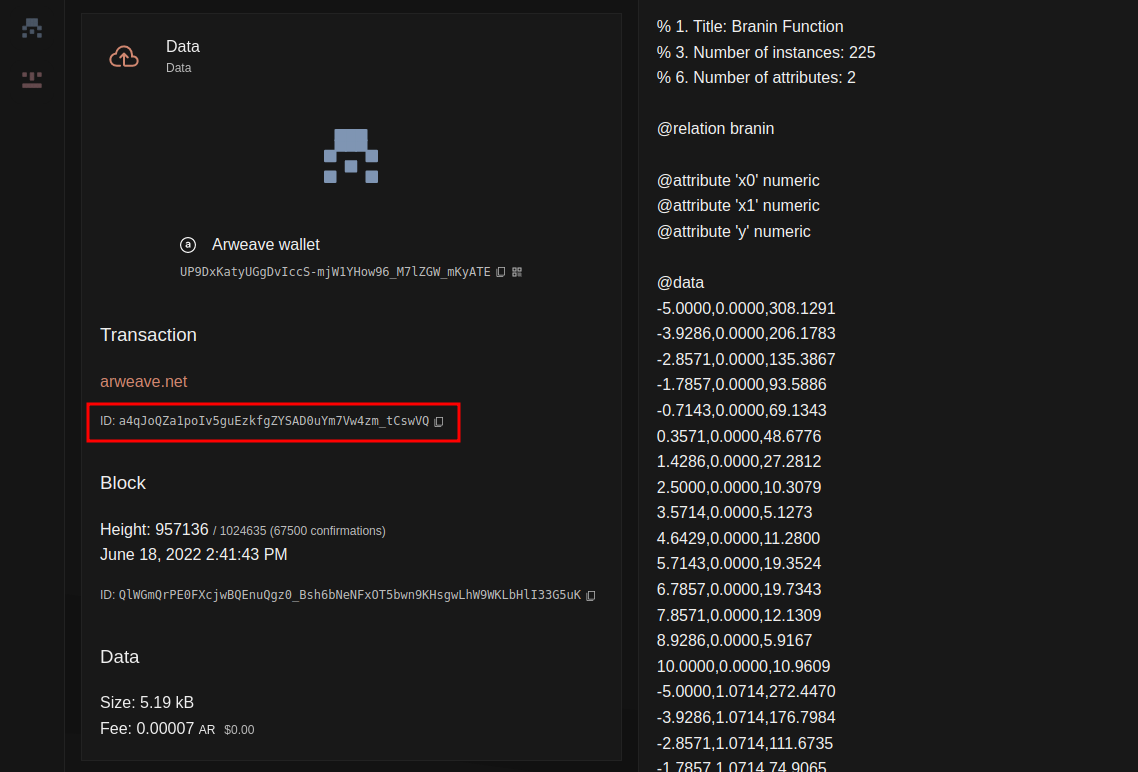
Step 4 - Copy the transaction ID
Once the transaction finalizes, select it, and copy the transaction ID.
Step 5 - Publish the asset with the transaction ID
Centralised hosting
AWS
AWS provides various options to host data and multiple configuration possibilities. Publishers are required to do their research and decide what would be the right choice. The below steps provide one of the possible ways to host data using AWS S3 bucket and publish it on Ocean Marketplace.
Prerequisite
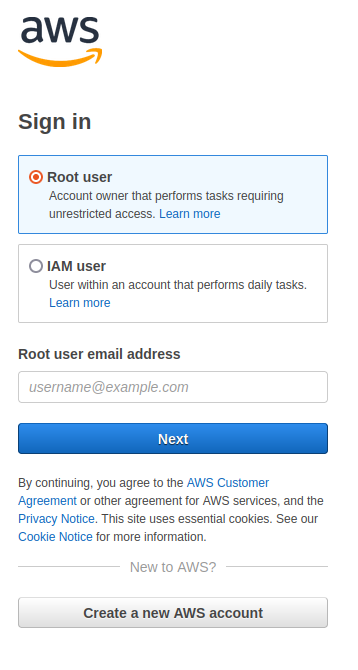
Create an account on AWS. Users might also be asked to provide payment details and billing addresses that are out of this tutorial's scope.
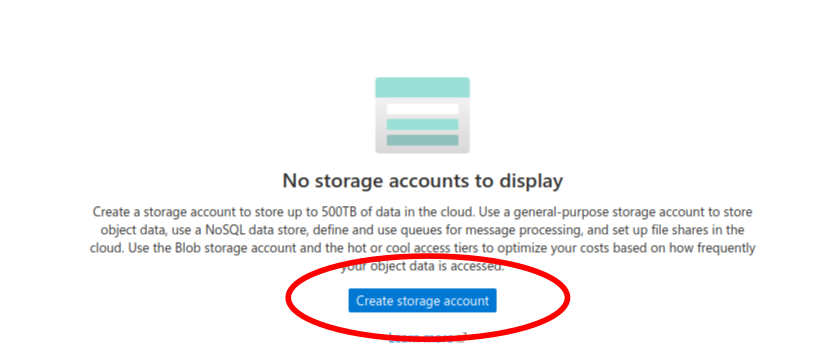
Step 1 - Create a storage account
Go to AWS portal
Go to the AWS portal for S3: https://aws.amazon.com/s3/ and select from the upper right corner Create an AWS account as shown below.

Fill in the details
 )
)
Create a bucket
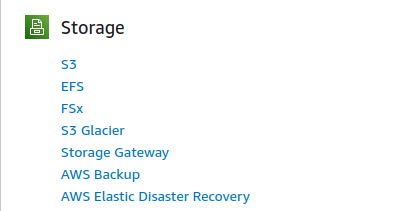
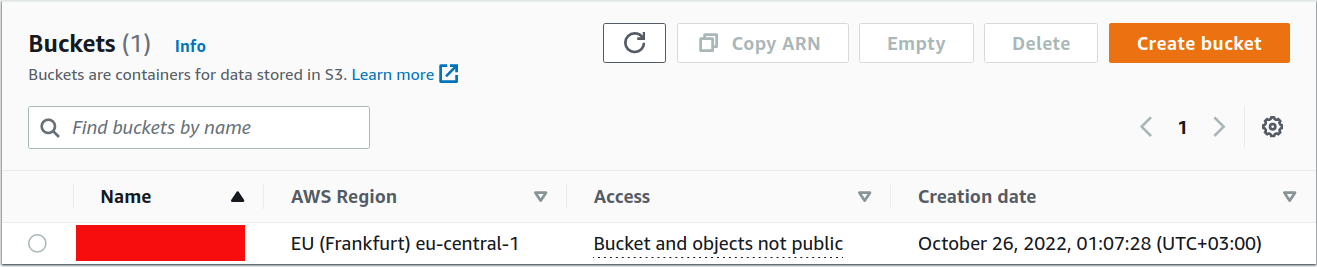
After logging into the new account, search for the available services and select S3 type of
storage.
In order to create a S3 bucket, choose Create bucket.
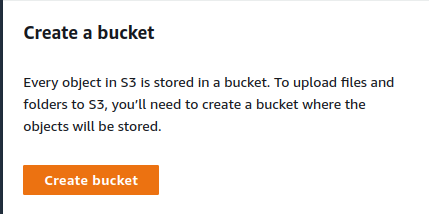
Fill in the form with the necessary information. Then, the bucket is up & running.
Step 2 - Upload asset on S3 bucket
Now, the asset can be uploaded by selecting the bucket name and choose Upload
in the Objects tab.

Add files to the bucket
Get the files and add them to the bucket.
The file is an example used in multiple Ocean repositories, and it can be found here.
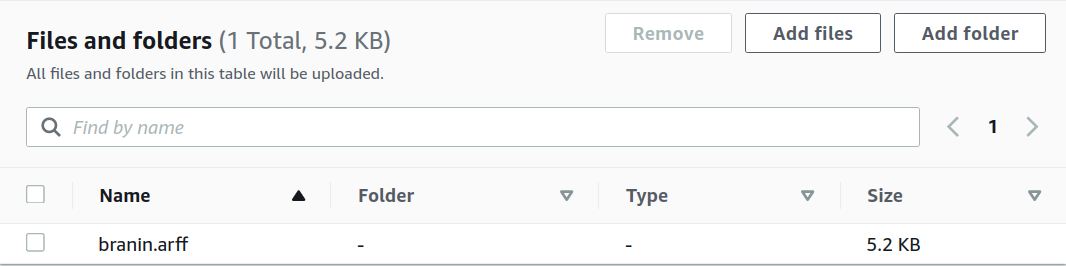
The permissions and properties can be set afterwards, for the moment keep them as default.
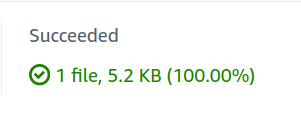
After selecting Upload, make sure that the status is Succeeded.
Step 3 - Access the Object URL on S3 Bucket
By default, the permissions of accessing the file from S3 bucket are set to private. To publish an asset on the market, the S3 URL needs to be public. This step shows how to set up access control policies to grant permissions to others.
Editing permissions
Go to the Permissions tab and select Edit and then uncheck Block all public access
boxes to give everyone read access to the object and click Save.
If editing the permissions is unavailable, modify the Object Ownership by enabling the ACLs
as shown below.

Modifying bucket policy
In order to have the bucket granted on public access, its policy needs to be modified likewise.
Note that the <BUCKET-NAME> must be chosen from personal buckets' dashboard.
{
  "Version": "2012-10-17",
  "Statement": [
    {
      "Sid": "Public S3 Bucket",
      "Principal": "*",
      "Effect": "Allow",
      "Action": "s3:GetObject",
      "Resource": "arn:aws:s3:::<BUCKET-NAME>/*"
    }
  ]
}
After saving the changes, the bucket should appear as Public access.
Verify the object URL on public access
Select the file from the bucket that needs verification and select Open. Now it should
be able to download the file on personal system.

Step 4 - Get the S3 Bucket Link & Publish Asset on Market
Now that the S3 endpoint has public access, the asset will be hosted successfully.
Go to Ocean Market to complete the form for asset creation.
Copy the Object URL that can be found at Object Overview from AWS S3 bucket
and paste it in the File field from the form found at step 2 as it is illustrated below.
Azure storage
Azure provides various options to host data and multiple configuration possibilities. Publishers are required to do their research and decide what would be the right choice. The below steps provide one of the possible ways to host data using Azure storage and publish it on Ocean Marketplace.
Prerequisite
Create an account on Azure. Users might also be asked to provide payment details and billing addresses that are out of this tutorial's scope.
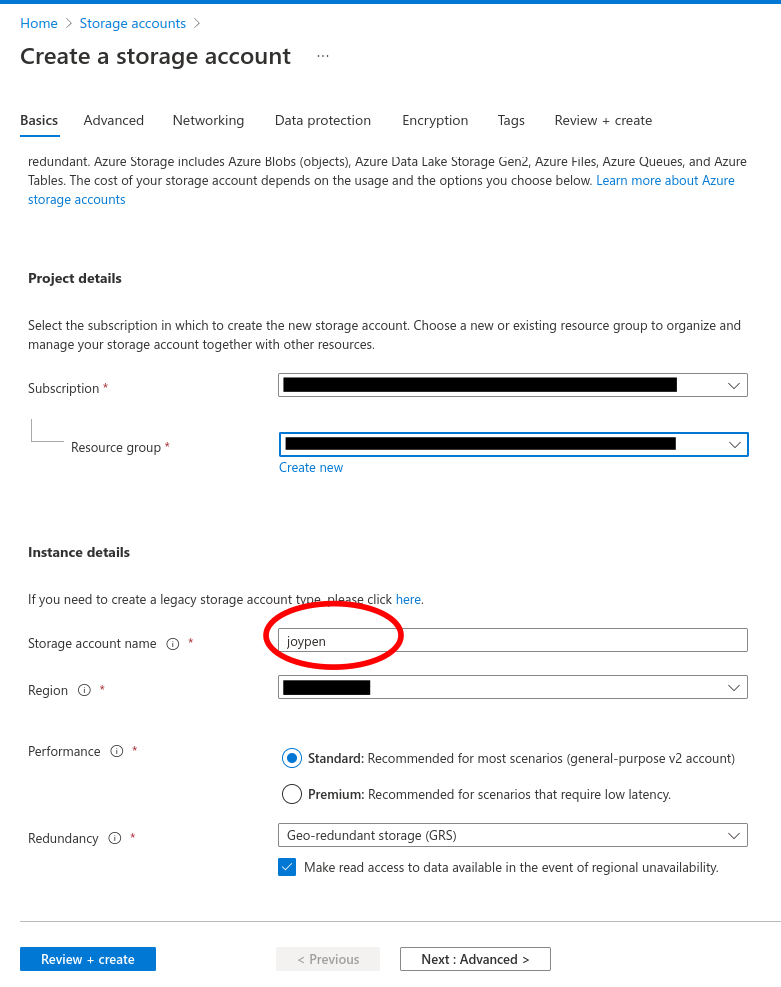
Step 1 - Create a storage account
Go to Azure portal
Go to the Azure portal: https://portal.azure.com/#home and select Storage accounts as shown below.

Create a new storage account
Fill in the details
Storage account created
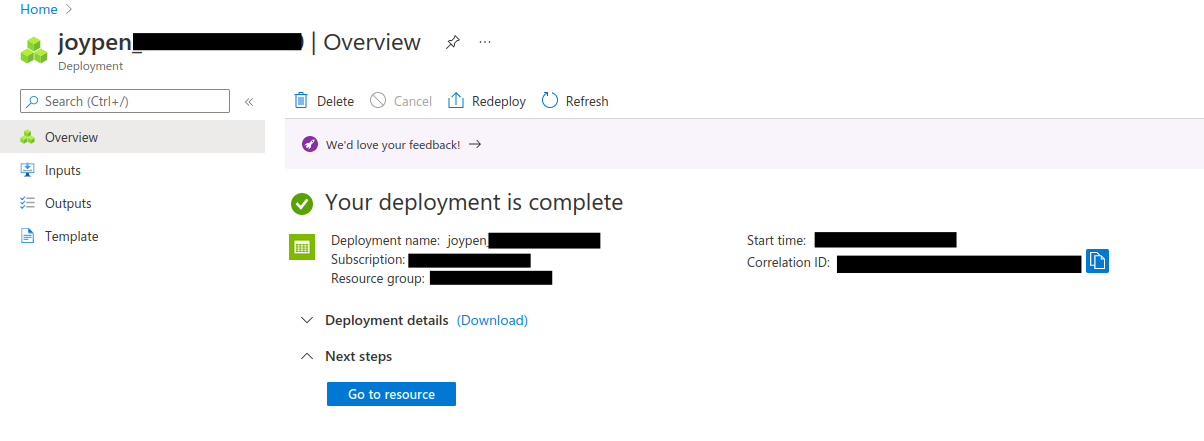
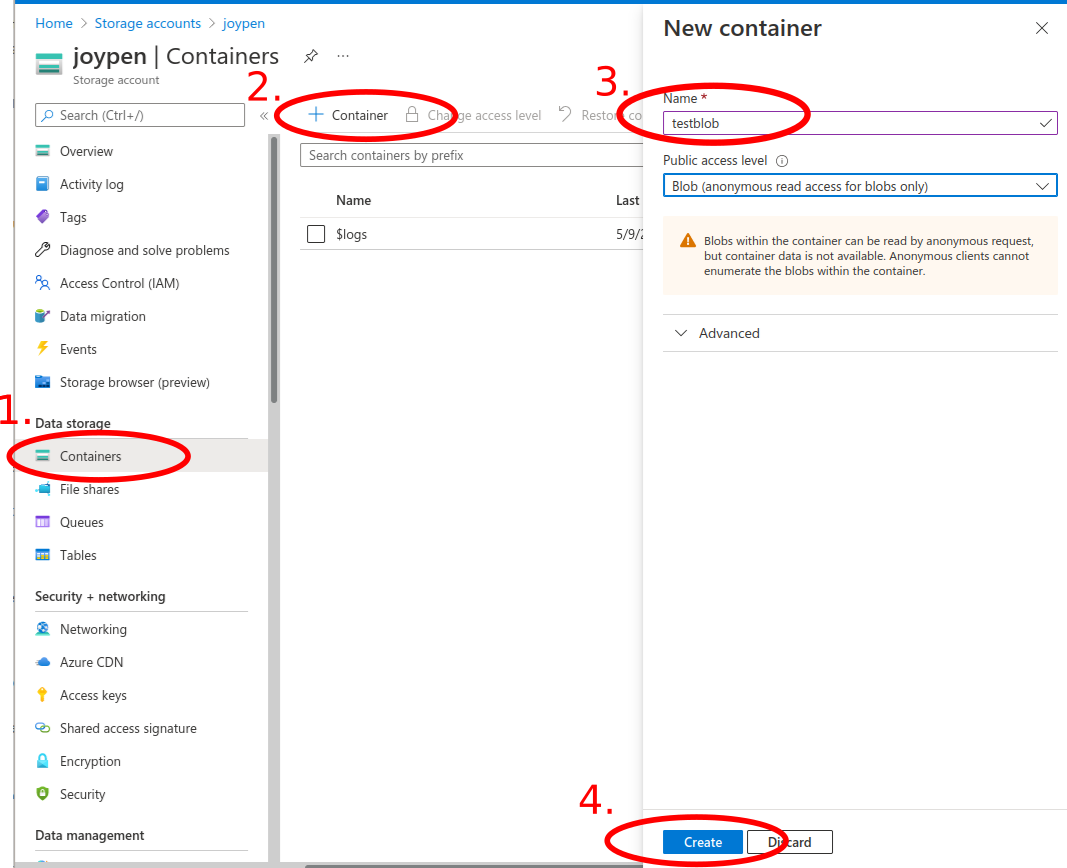
Step 2 - Create a blob container
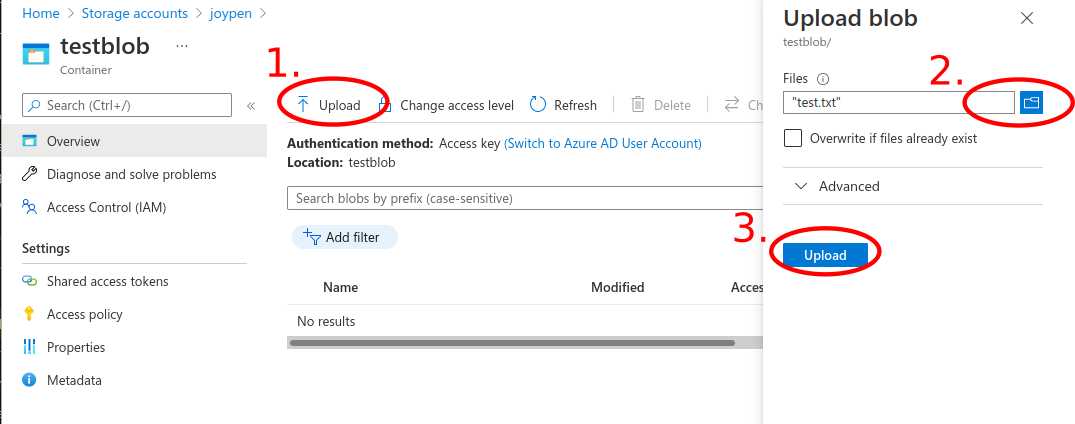
Step 3 - Upload a file
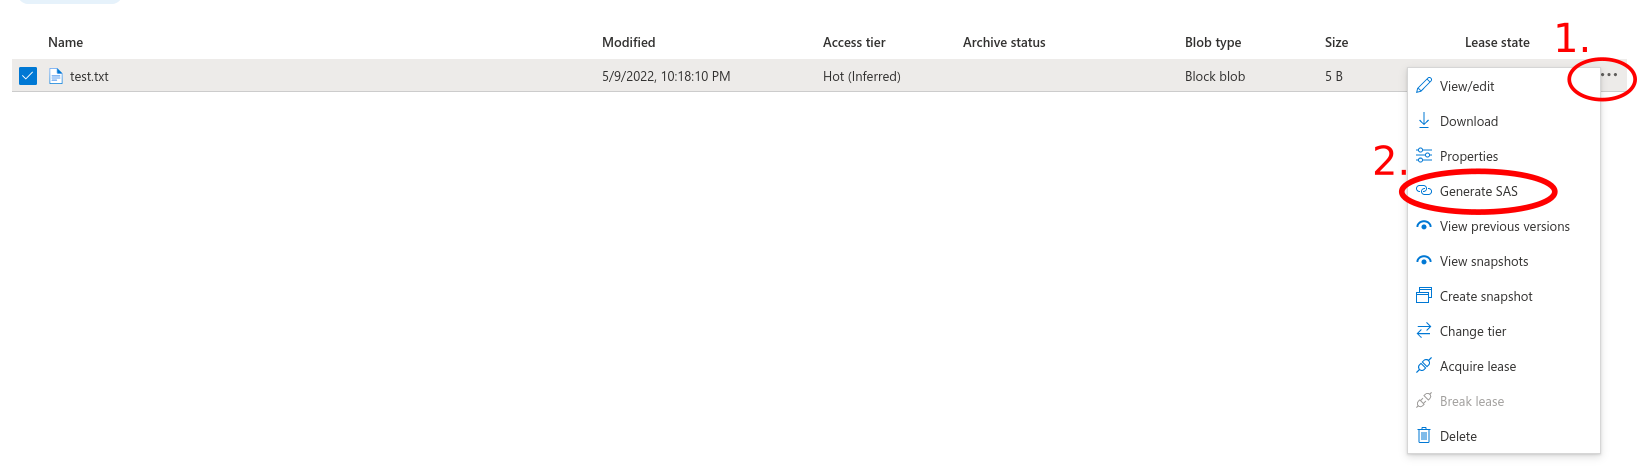
Step 4 - Share the file
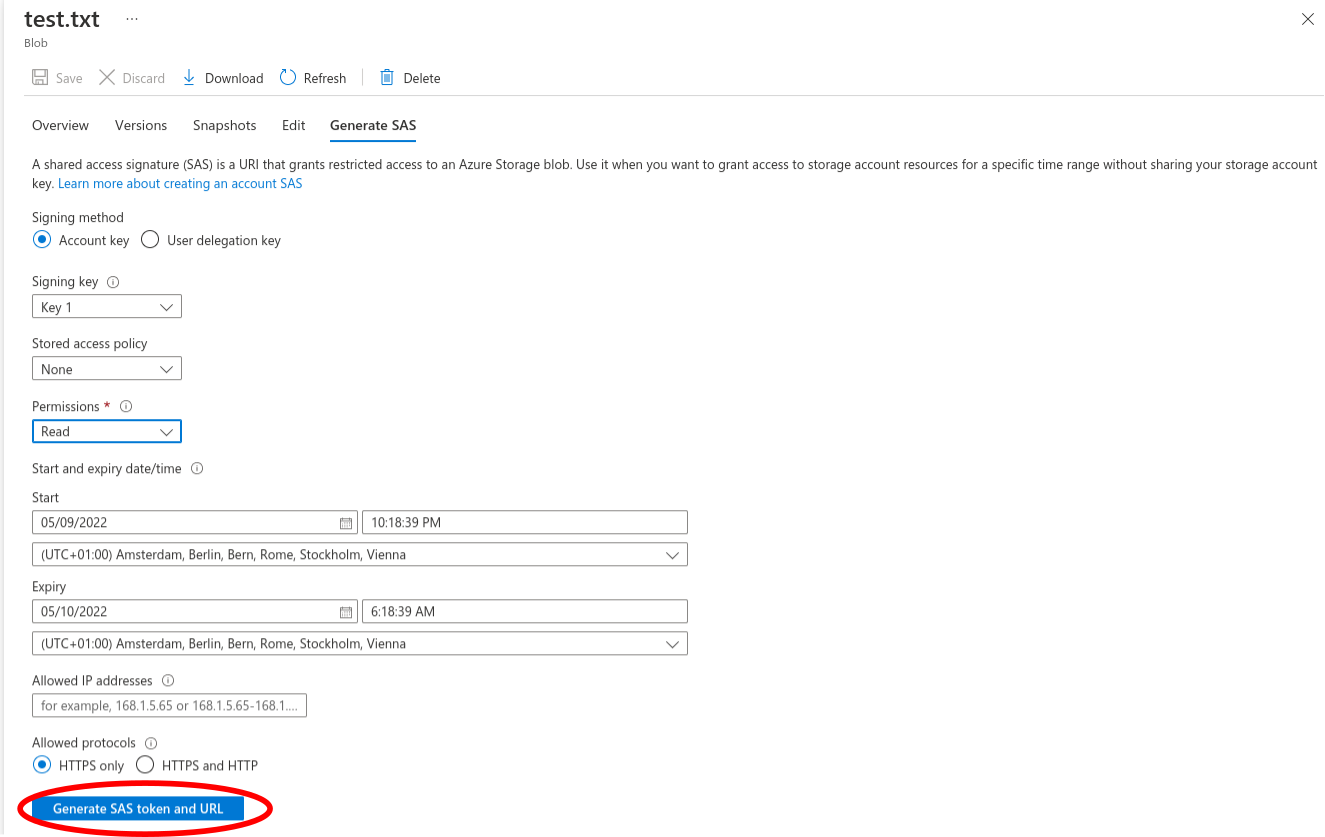
Select the file to be published and click Generate SAS
Configure the SAS details and click Generate SAS token and URL
Copy the generated link

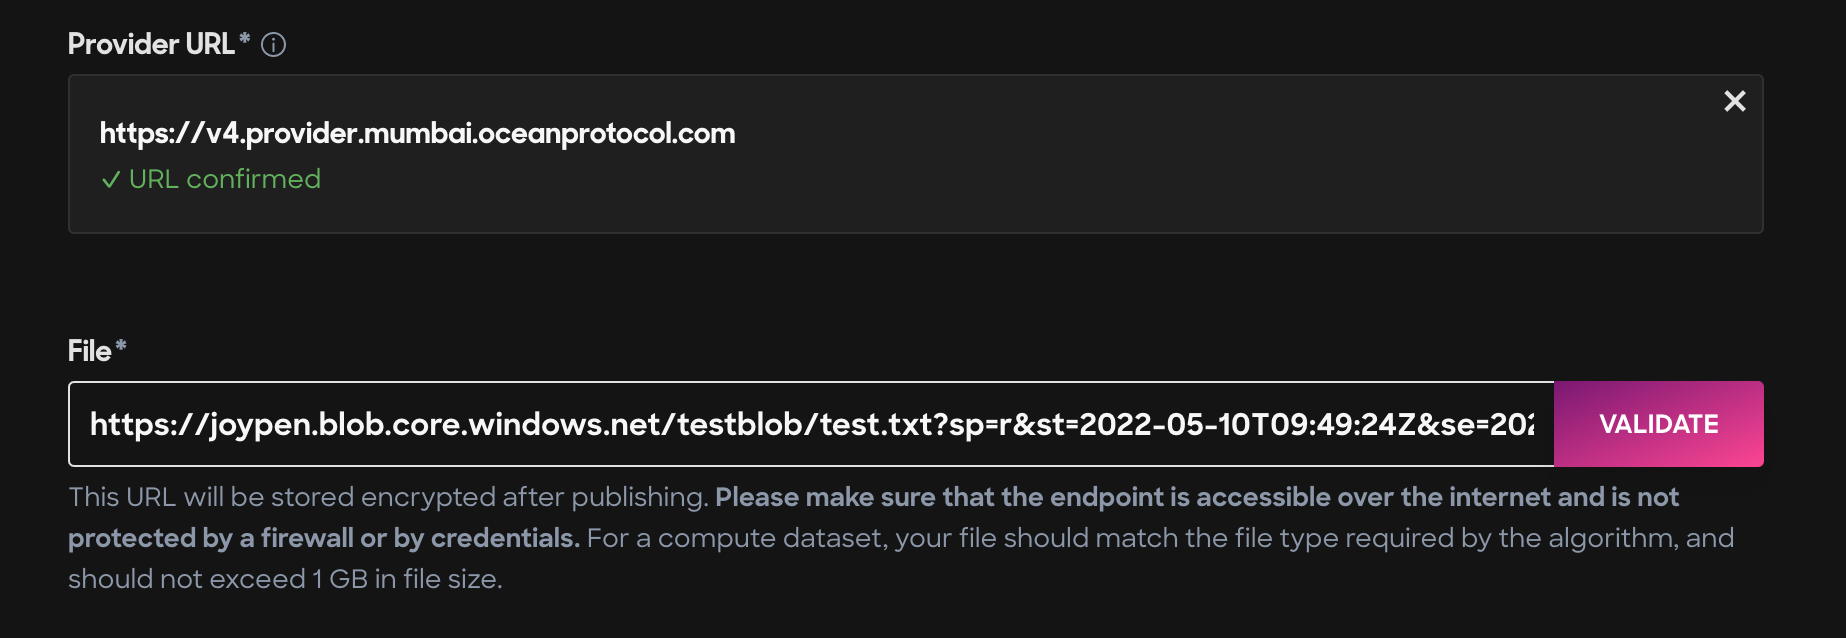
Step 5 - Publish the asset using the generated link
Now, copy and paste the link in the Publish page in the Ocean Marketplace.